First, you need a Tulip Tie-Dye Kit. There a lots of choices and I went with the Neon. You will also need a button (not the three you see above), a flower cookie cutter or flower shape of your choice, scissors and thread. For this project you need two onesies.
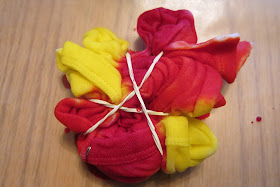
The instructions enclosed in the kit are excellent and I had no trouble following them. For the main onesie, I went with the swirl method and this is what the onesie looked like after I put the rubber bands on. Remember to prewash your item before you tie-dye to get the best results.
Lay down some plastic to protect the surface you are working on. The tie-dye kit has premeasured dye in bottles and all you need to do is add water. I chose to use the pink, orange and yellow. Next I squirted sections across from each other in the same color. Turn over and repeat. I let it set for 7 to 8 hours to allow the colors to set.
This is what it looked like after I removed the rubber bands.
For the second onesie which will be used to make the flower, I used the crumble method.
I squirted dye all over. I used only one color.
When die is set, put both onesies in the wash and run through a cycle. I did it with some dark colored towels. Don't add light colored laundry to the load. It might stain. Afterwards, I cut the side seams of the crumple onesie.

I pressed the flower cookie cutter into the fabric and it left a nice indentation. Cut out. You can also find a flower shape, trace it onto the onesie and cut out.
Center the flower on the onesie, place the button on the center of the flower and stitch in place.
Finished! I absolutely love it and can't wait to do it again.
I Love To Create provided the tie-dye kit used in this project.


No comments:
Post a Comment